Back to AQA Loci & Construction (F) Home
4.2 D) Construction: Bisecting Lines
4.2 D) Construction: Bisecting Lines
A bisecting line is a line that passes between two points. All of the points on a bisecting line are equal distance away from the points that it is bisecting. The bisecting line will be perpendicular to the line that connects the two points.
An example would be a canal boat going between a lock.
An example would be a canal boat going between a lock.
Bisecting Lines – Two Points
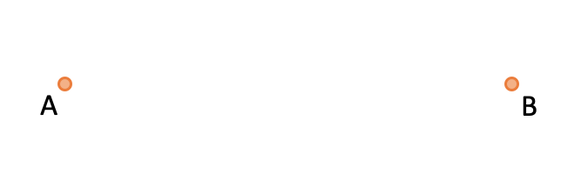
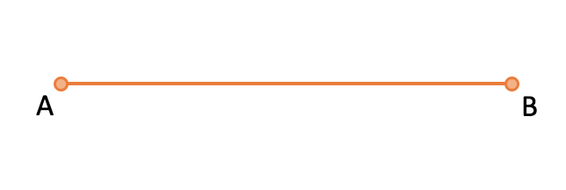
Draw the perpendicular bisector of the points A and B. Click here for a printable version of the examples in this section.
Draw the perpendicular bisector of the points A and B. Click here for a printable version of the examples in this section.
There are a few different steps to draw the perpendicular bisector.
Step 1
The first step is to draw a line that connects the two points together. This step is not 100% necessary, but I think that it is helpful.
Step 1
The first step is to draw a line that connects the two points together. This step is not 100% necessary, but I think that it is helpful.
Step 2
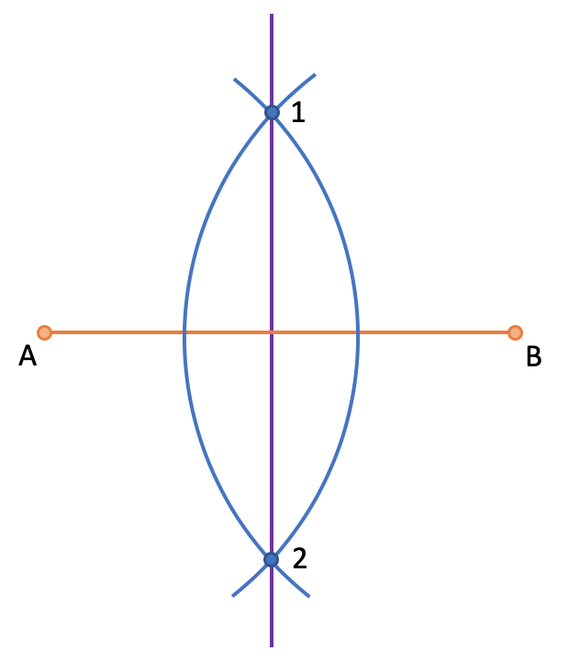
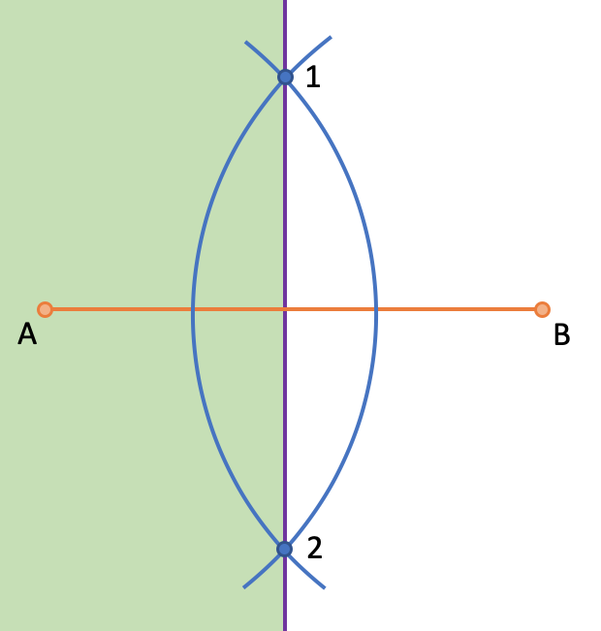
The next step is to open the compass so that it is a few centimetres longer than half the distance between point A and B. We then draw an arc from point A and point B. We are drawing these arcs so that they cross one another twice; once above the line between A and B, and once below the line between A and B. I have labelled the crossing of the two arcs above the line point 1, and the crossing below the line as point 2.
The next step is to open the compass so that it is a few centimetres longer than half the distance between point A and B. We then draw an arc from point A and point B. We are drawing these arcs so that they cross one another twice; once above the line between A and B, and once below the line between A and B. I have labelled the crossing of the two arcs above the line point 1, and the crossing below the line as point 2.

Step 3
The final step is to draw a line that passes through point 1 and point 2 using a ruler. We now have our perpendicular bisector.
The final step is to draw a line that passes through point 1 and point 2 using a ruler. We now have our perpendicular bisector.
Example
Questions involving perpendicular bisectors usually ask us to shade the parts on the diagram that are closer to one point than another point.
Question: shade the points on the above diagram that are closer to A than B.
We know that all of the points on a bisecting line are equal distance from the two points that they are bisecting. Therefore, any point on the left of the bisecting line will be closer to point A, and any point on the right of the bisecting line will be closer to point B. We were asked to shade all of the parts of the diagram above that are closer to A than B. Therefore, we shade everything that is on the left of the bisecting line.
Bisecting Lines – Angle
We are now going to have a look at drawing a line that bisects an angle. Any point on the bisect that we draw will be equal distance from the two lines that create the angle.
For example, bisect the angle A.
We are now going to have a look at drawing a line that bisects an angle. Any point on the bisect that we draw will be equal distance from the two lines that create the angle.
For example, bisect the angle A.

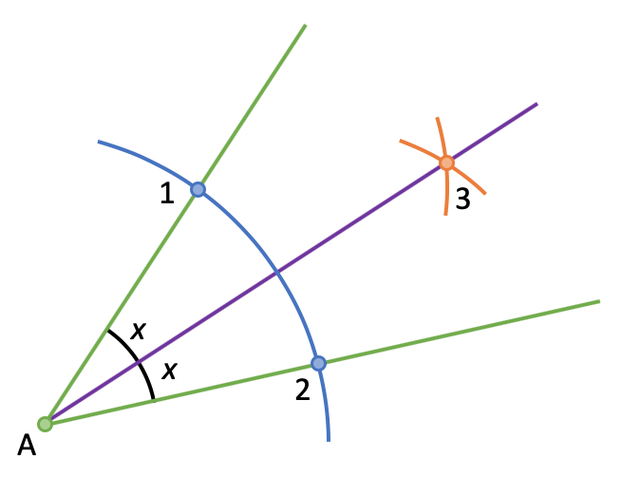
Step 1
The first step is to place the point of the compass at A and draw an arc that crosses both of the lines that make up the angle. You want the compass to be around 4 or 5 cm. I have labelled the points where the arc crosses the lines that make up the angle point 1 and point 2.
The first step is to place the point of the compass at A and draw an arc that crosses both of the lines that make up the angle. You want the compass to be around 4 or 5 cm. I have labelled the points where the arc crosses the lines that make up the angle point 1 and point 2.
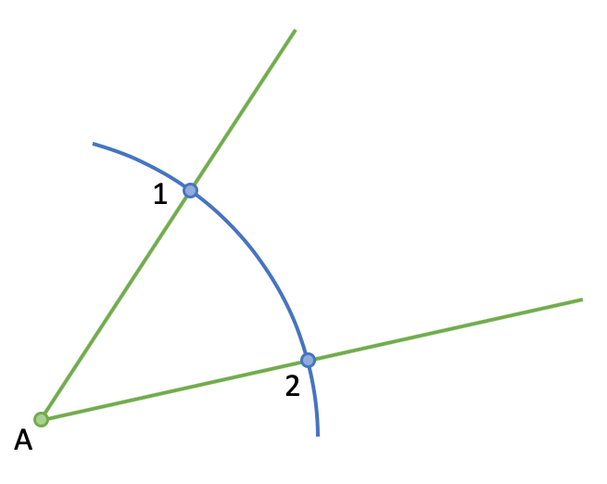
Note: you do not need to draw one continuous arc; you could have just drawn the arcs over each of the lines that make up the angle.
Step 2
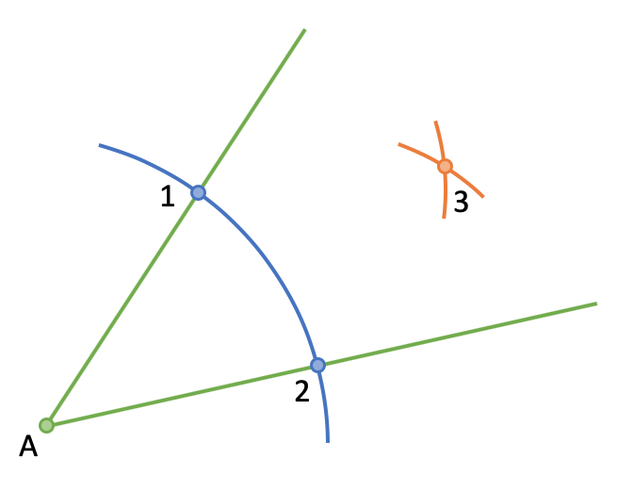
The next step is to draw an arc from both point 1 and point 2. We are looking for both of the arcs to cross in the middle of the two lines that create the angle. I have labelled the point where these two arcs cross as point 3.
Step 2
The next step is to draw an arc from both point 1 and point 2. We are looking for both of the arcs to cross in the middle of the two lines that create the angle. I have labelled the point where these two arcs cross as point 3.
Step 3
The final step is to draw a line that passes through point A and point 3. We now have our bisector.
The final step is to draw a line that passes through point A and point 3. We now have our bisector.
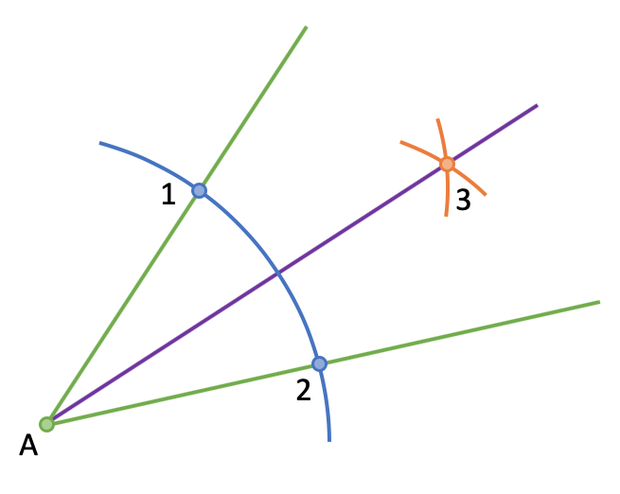
The bisector has created two angles and these angles are the same size.
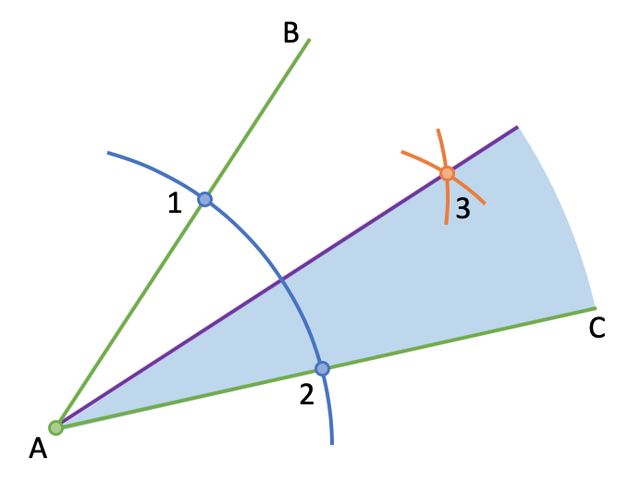
Example
These questions can be extended by being asked to shade the parts of the diagram that are closer to one line than the other line. Before I ask the question, I am going to add the letters B and C to the diagram.
These questions can be extended by being asked to shade the parts of the diagram that are closer to one line than the other line. Before I ask the question, I am going to add the letters B and C to the diagram.
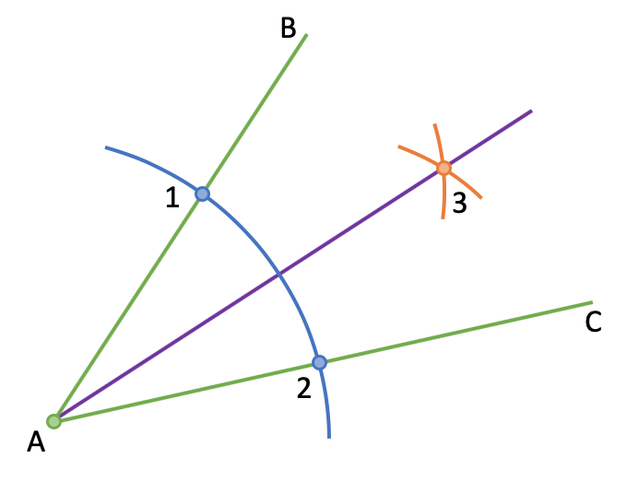
Question: shade the parts on the above diagram that are closer to the line AC than AB.
Every point on the bisecting line is equal distance from the lines that make up the angle (line AB and AC). We are asked to shade all of the parts on the diagram that are closer to AC than AB. These points will be below the bisecting line. I have shaded this area on the diagram below.
Every point on the bisecting line is equal distance from the lines that make up the angle (line AB and AC). We are asked to shade all of the parts on the diagram that are closer to AC than AB. These points will be below the bisecting line. I have shaded this area on the diagram below.