Back to Edexcel Transformations (H) Home
4.3 D) Rotation: Undertaking
4.3 D) Rotation: Undertaking
Rotations turn a shape around a fixed position. There are three pieces on information we need for rotations:
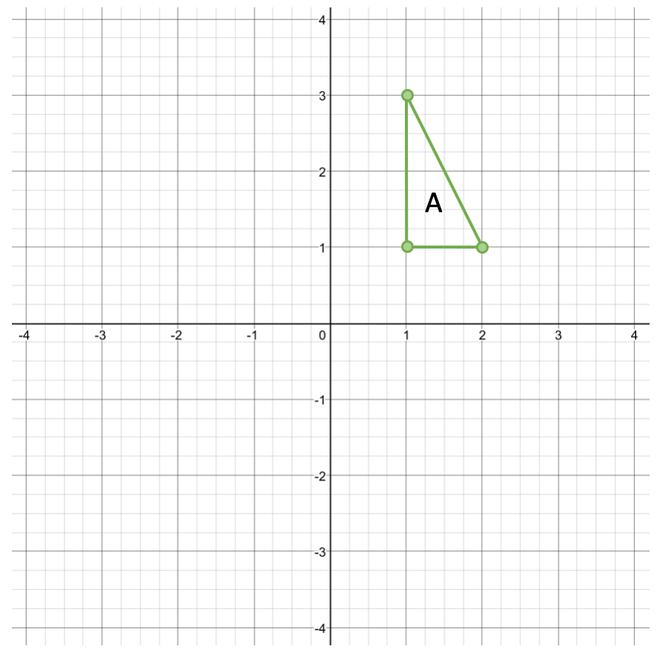
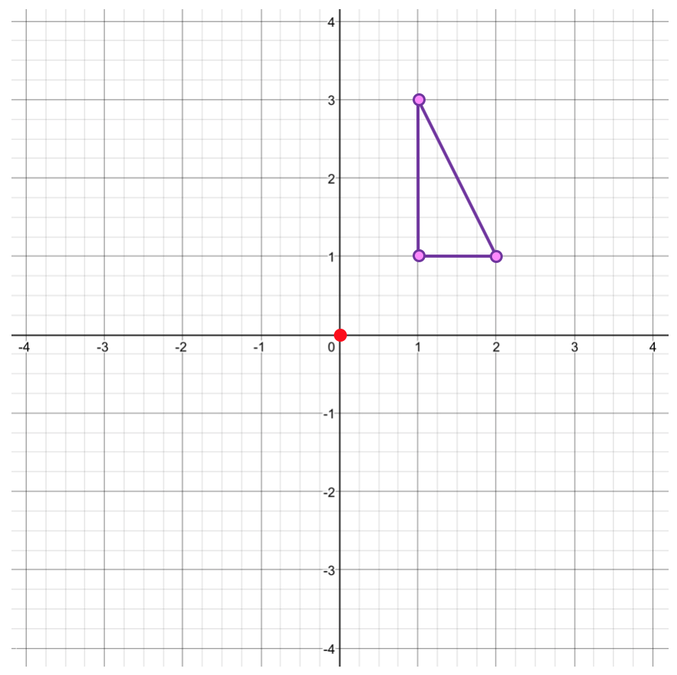
We are going to have a look at the outcomes for a few different rotations for the shape on the graph below.
- The centre of rotation – the point where the shape is rotated around
- The angle of rotation – the number of degrees that the shape is rotated
- The direction of rotation – clockwise or anticlockwise
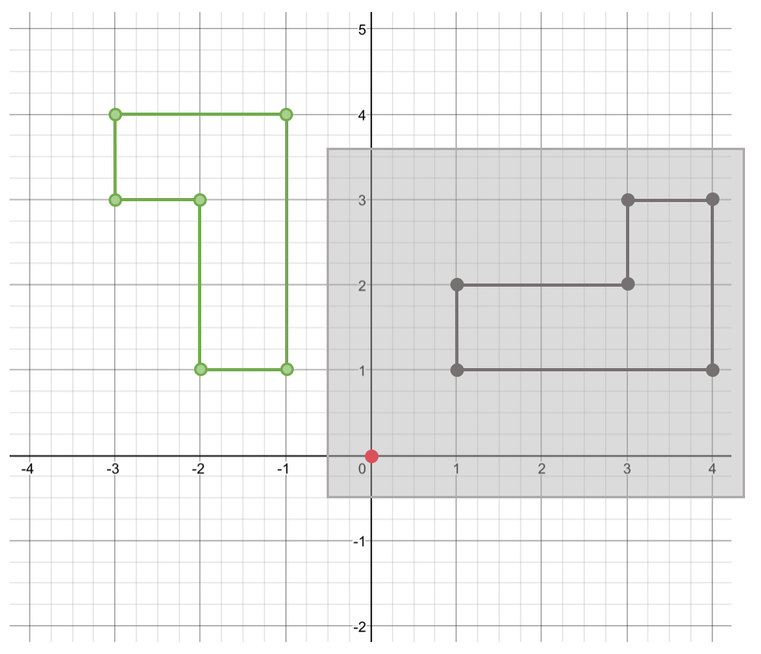
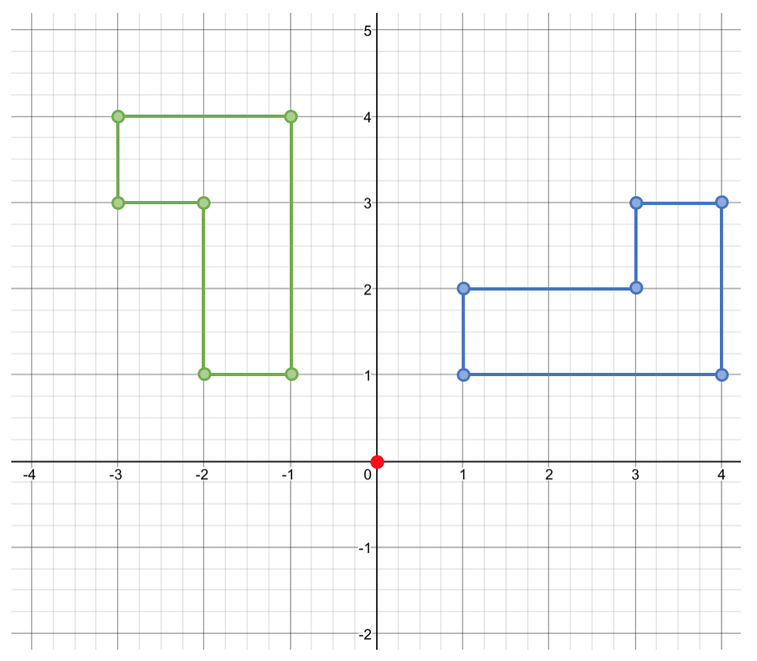
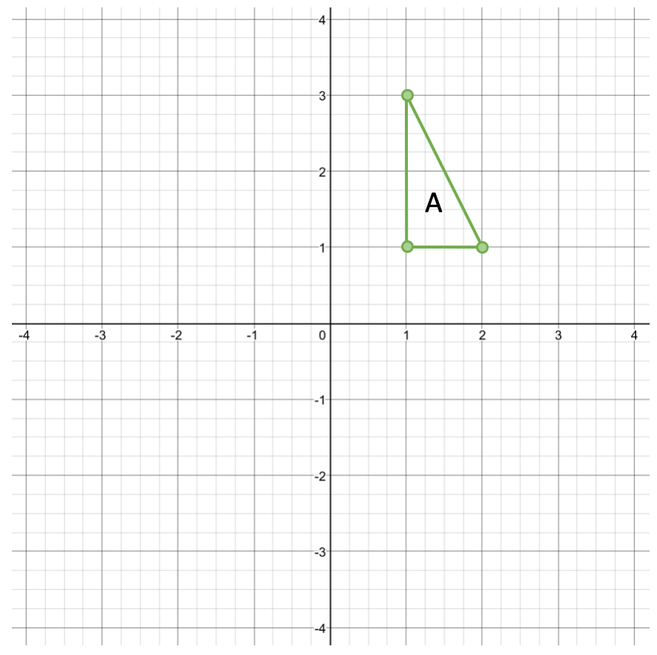
We are going to have a look at the outcomes for a few different rotations for the shape on the graph below.
We are going to be rotating the shape clockwise through a few different angles around the origin, which has the coordinates (0, 0).
90° Clockwise
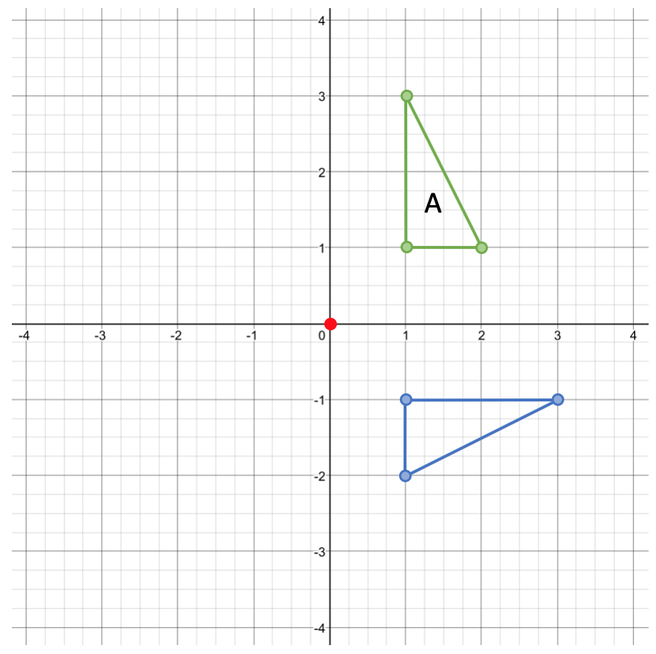
The first rotation is 90° clockwise around the origin. A rotation of 90° is one quarter of a full turn. This is shown on the graph below:
90° Clockwise
The first rotation is 90° clockwise around the origin. A rotation of 90° is one quarter of a full turn. This is shown on the graph below:
180° Clockwise
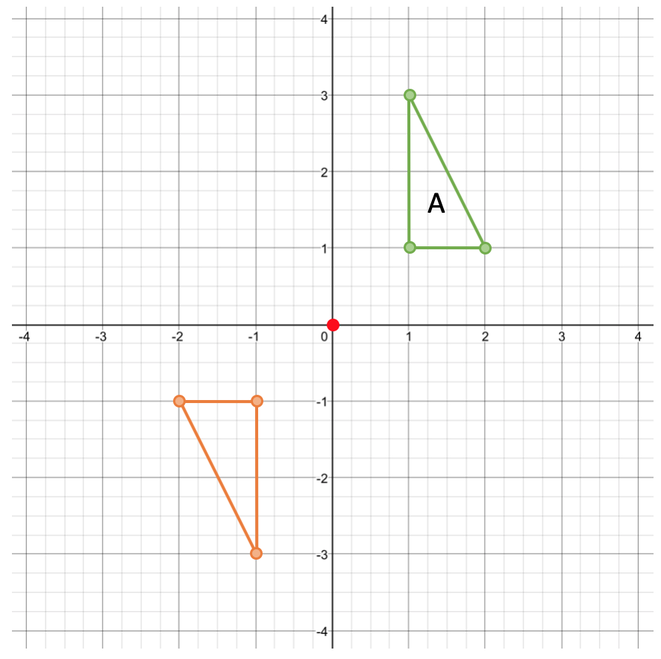
The next rotation is 180° clockwise around the origin. A rotation of 180° is half a full turn. This is shown on the graph below:
The next rotation is 180° clockwise around the origin. A rotation of 180° is half a full turn. This is shown on the graph below:
270° Clockwise
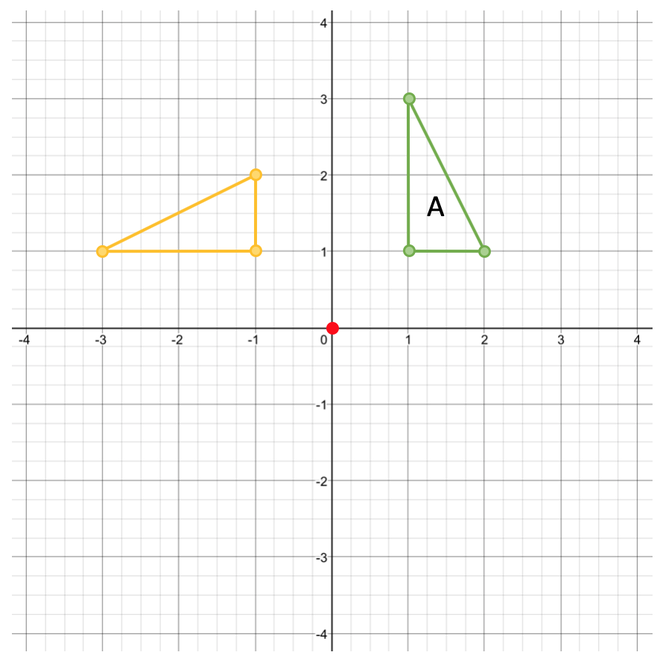
The next rotation is 270° clockwise around the origin. A rotation of 270° is three quarters of a full turn. This is shown on the graph below:
The next rotation is 270° clockwise around the origin. A rotation of 270° is three quarters of a full turn. This is shown on the graph below:
360° Clockwise
The final rotation is 360° clockwise around the origin. A rotation of 360° is one complete full turn. This means that the rotated shape will be in exactly the same position as the shape. This is shown on the graph below:
The final rotation is 360° clockwise around the origin. A rotation of 360° is one complete full turn. This means that the rotated shape will be in exactly the same position as the shape. This is shown on the graph below:
The Process of Rotating a Shape
I am going to go through the process of rotating a shape through an example. Click here for a printable version of this example and the next example.
Example 1
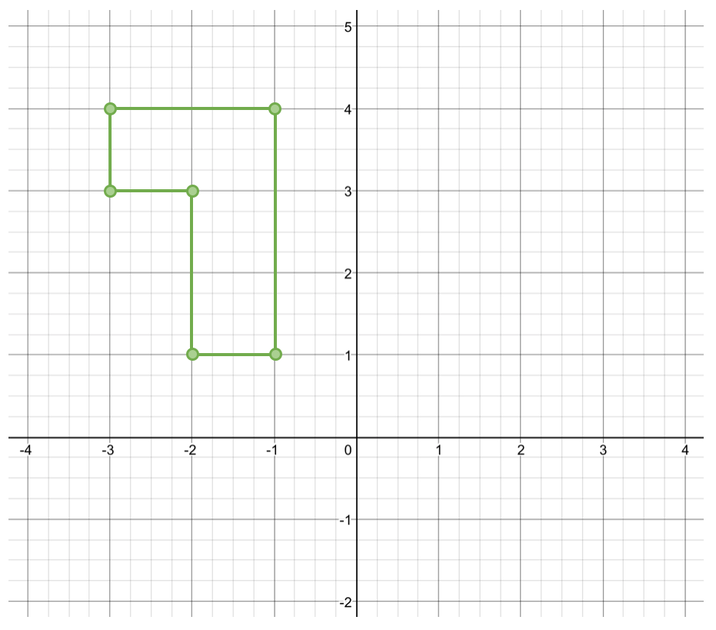
Rotate the following shape 90° clockwise around the origin.
I am going to go through the process of rotating a shape through an example. Click here for a printable version of this example and the next example.
Example 1
Rotate the following shape 90° clockwise around the origin.
Step 1
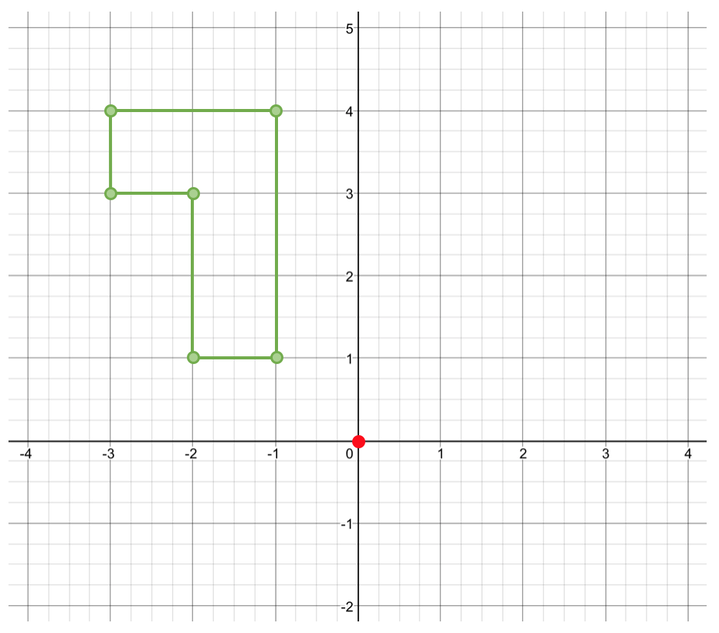
The first step in rotating a shape is to mark on the centre of rotation. The question tells us that the centre of rotation is the origin. I have marked the origin on the graph below.
The first step in rotating a shape is to mark on the centre of rotation. The question tells us that the centre of rotation is the origin. I have marked the origin on the graph below.
Step 2
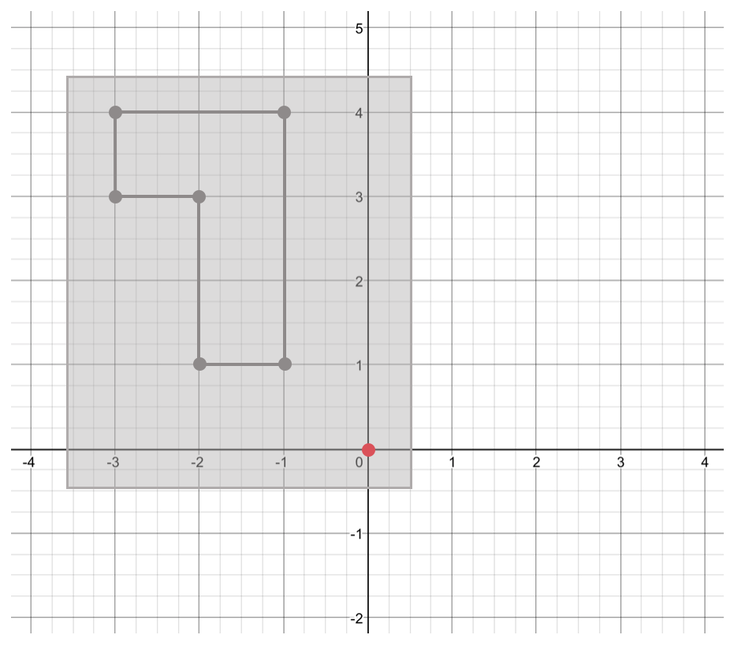
The next step in rotating a shape is to draw over the shape on tracing paper. When we are drawing around the shape on tracing paper, we need to make sure that the centre of rotation is underneath the tracing paper.
The next step in rotating a shape is to draw over the shape on tracing paper. When we are drawing around the shape on tracing paper, we need to make sure that the centre of rotation is underneath the tracing paper.
Step 3
The next step is to hold the tracing paper down with your pencil at the centre of rotation (this is why you need to ensure that the point that you are rotating the shape around is underneath the tracing paper when you are tracing over the shape). We are rotating the shape around the origin, so we place the tip of our pencil on the origin.
Step 4
We now rotate the shape through the angle and in the direction that we are given in the question. The question asks us to rotate the shape 90° clockwise, so we rotate the tracing paper 90° clockwise whilst still holding the pencil on the centre of rotation. A 90° rotation is a quarter of a full turn.
Step 5
After we have completed the rotation, we can draw the rotated shape underneath the tracing paper; it is best to lift the tracing paper, mark a few points, put the tracing paper back down and then repeat until you have all of the points. The original shape and the rotated are shown on the diagram below.
After we have completed the rotation, we can draw the rotated shape underneath the tracing paper; it is best to lift the tracing paper, mark a few points, put the tracing paper back down and then repeat until you have all of the points. The original shape and the rotated are shown on the diagram below.
Example 2
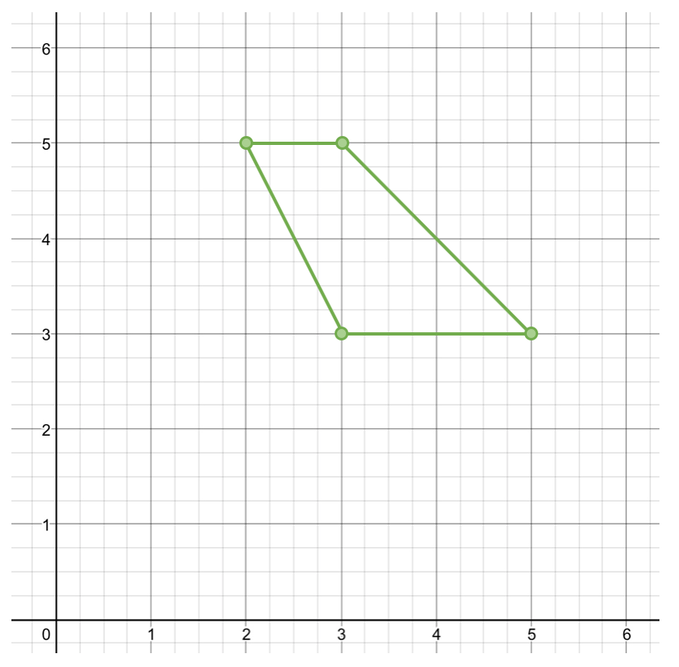
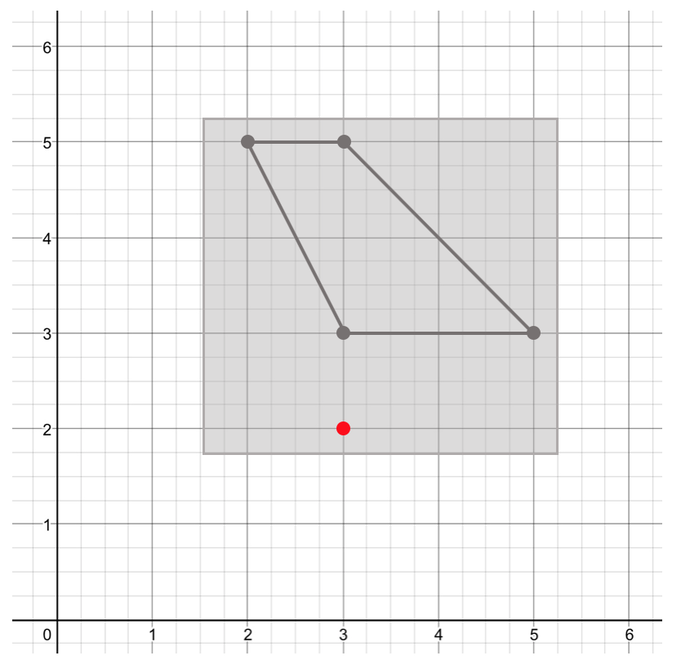
Rotate the shape below 270° degrees clockwise around the coordinates (3, 2).
Rotate the shape below 270° degrees clockwise around the coordinates (3, 2).
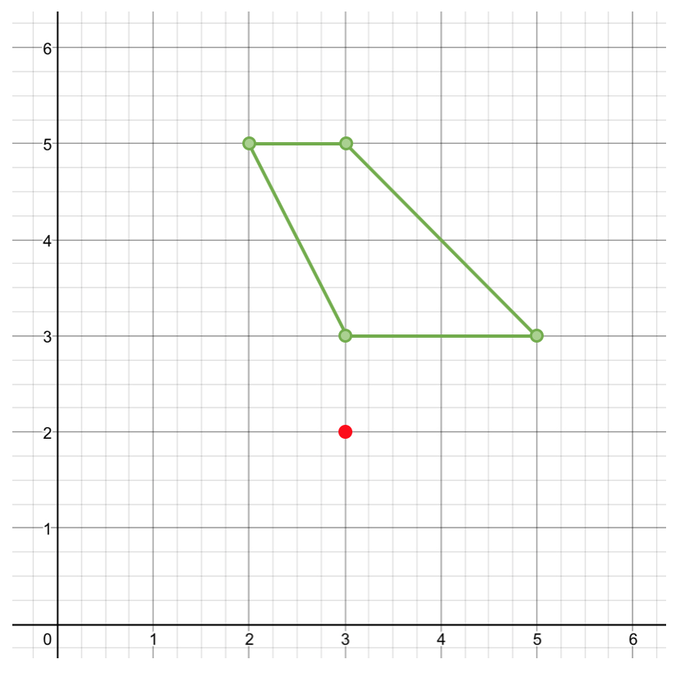
We are able to answer this question by going through the 5 steps. The first step is to mark on the centre of rotation. We are told in the question that the centre of rotation is the point (3, 2). In coordinates, the x coordinate comes first, and the y coordinate comes second. Therefore, the x value is 3 and the y value is 2. I have plotted this coordinate on the graph below:
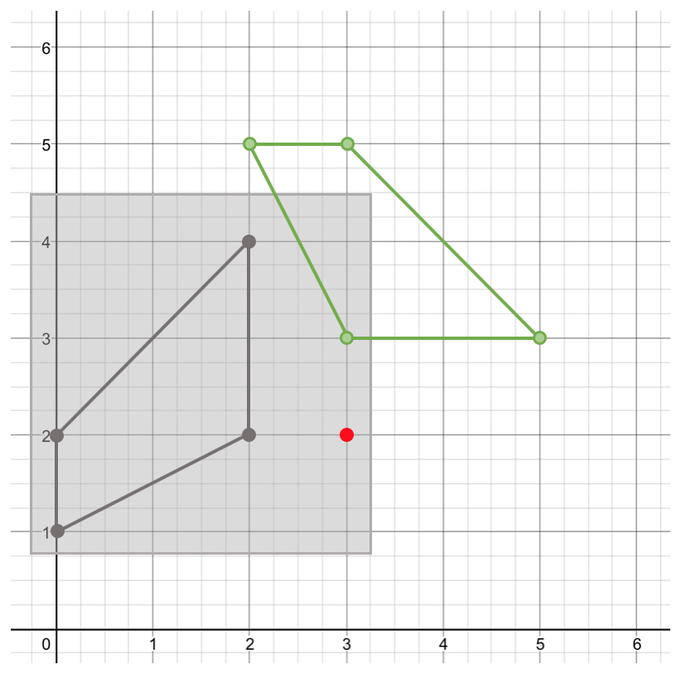
The second step is to trace around the shape. When we are tracing around the shape, we need to make sure that the centre of rotation is underneath the tracing paper.
The third step is to place a pencil on the centre of rotation.
The fourth step is to rotate the shape around the centre of rotation. We are rotating the shape 270° clockwise. 270° is three quarters of a full turn.
The fourth step is to rotate the shape around the centre of rotation. We are rotating the shape 270° clockwise. 270° is three quarters of a full turn.
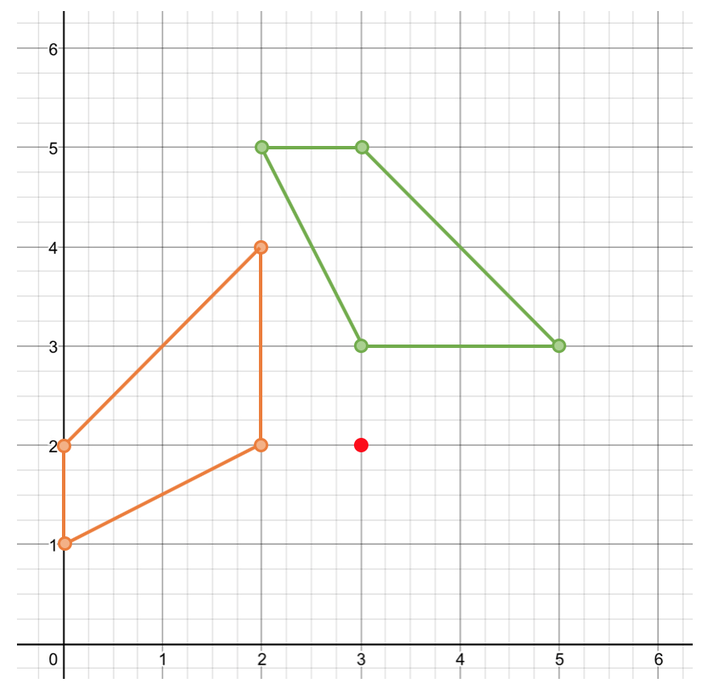
The final step is to draw the image below the tracing paper. We do by lifting up the tracing paper, marking some of the points and repeating until all of the points are marked on the shape. The rotated image is shown on the diagram below.
Same Rotations
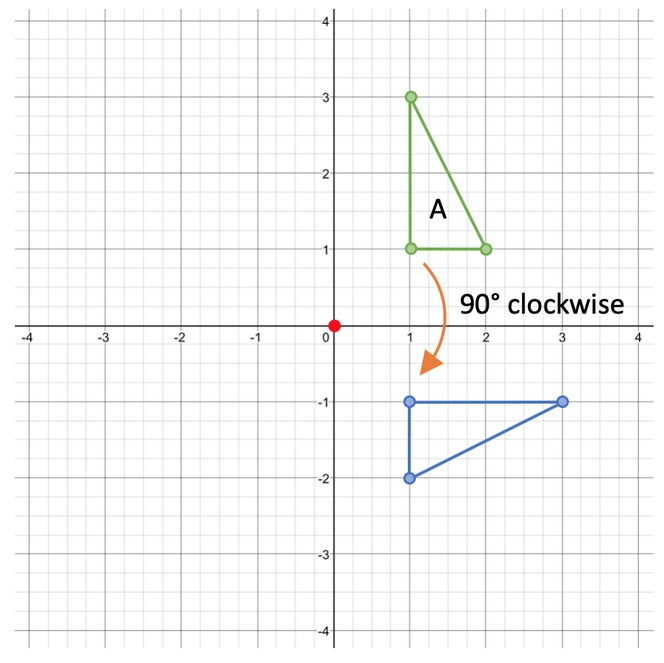
We are able to give rotations of a shape in both a clockwise and anticlockwise direction. The angle of rotation in a clockwise and anticlockwise direction will add up to 360°. For example, I am going to rotate the shape below 90° in a clockwise direction around the point (0, 0)/ the origin.
We are able to give rotations of a shape in both a clockwise and anticlockwise direction. The angle of rotation in a clockwise and anticlockwise direction will add up to 360°. For example, I am going to rotate the shape below 90° in a clockwise direction around the point (0, 0)/ the origin.
90° clockwise is one quarter of a full turn. The rotation is shown below:
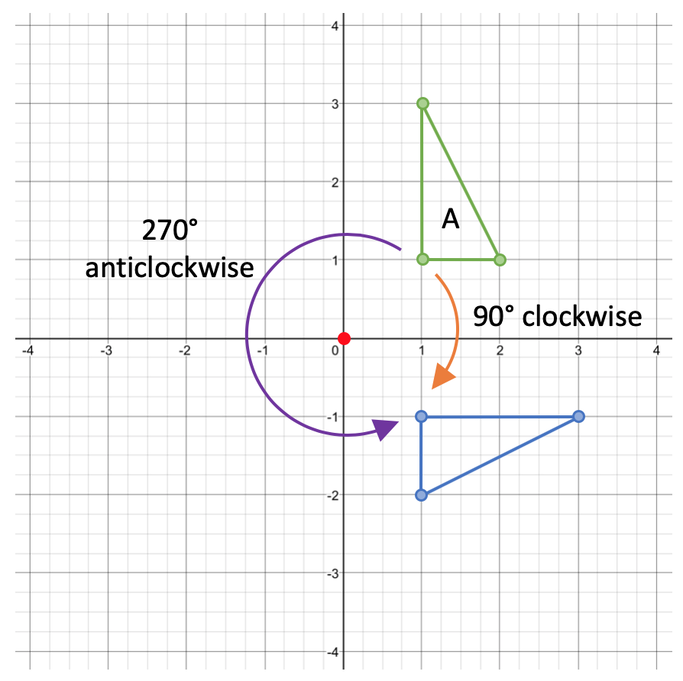
We could have also rotated this shape 270° in an anticlockwise direction. 270° is three quarters of a full turn.
The angle in a clockwise direction (90°) and in an anticlockwise direction (270°) add up to 360°.
180° Rotation
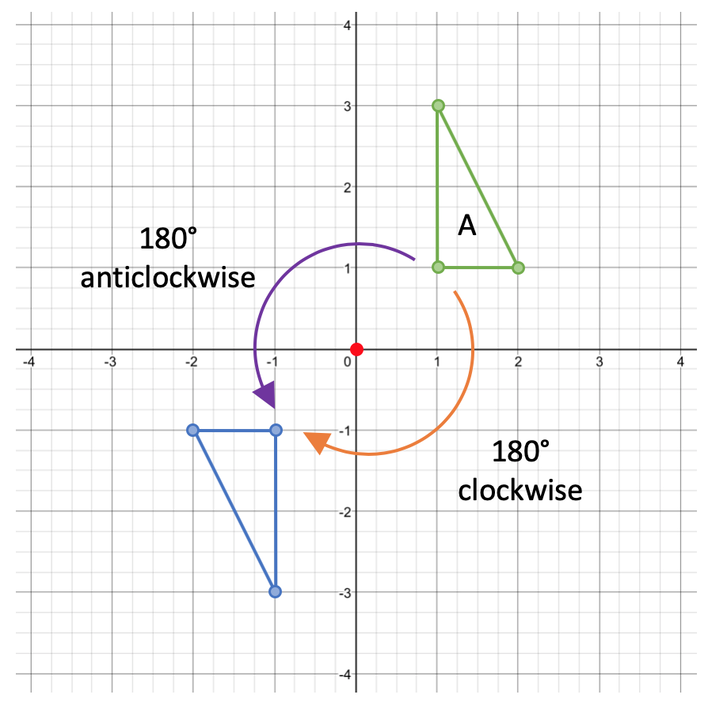
A 180° rotation is half a full turn. Half a full turn will be the same in a clockwise and anticlockwise direction. Therefore, the direction does not matter when we have a 180° rotation.
A 180° rotation is half a full turn. Half a full turn will be the same in a clockwise and anticlockwise direction. Therefore, the direction does not matter when we have a 180° rotation.

